Showing posts with label Tutorials. Show all posts

Friday, May 31, 2013

TVDStyle header

I am an owner of the fashion blog called TVD Style where I post fashion worn on the tv series The Vampire Diaries, airing on CW. Last night I thought it was finally time for a theme change, and I was also feeling that my previous theme was... mainstream? I wanted something really unique and something that makes you go ''Ahh, they use that theme on TVD Style!' when you see it on another blog. The choice fell on a gorgeous theme which you can see being used on the blog now.

And this new theme had a header, so I wanted to do something really quick in Photoshop. Obviously I wanted this to be very unique too, so I googled 'magical forest' (I know) and chose a nice picture.


After, I erased the background from these three photos:


I added them in the left corner of the photo, added a psd coloring and woop, it's done!  And the result?


Ta...daaa!!


Monday, November 28, 2011

Making sunlight in your graphic

1. Open the picture/graphic you want to work with.
2. Create a new layer: CTRL+SHIFT+N
3. Now, select the Polygonal Lasso tool and draw how you'd like the sun to shine. I usually do zig-zag, but it can be however you'd like.
4. Select the Paint Bucket tool and paint everything inside the zig-zag or whatever you've done with the polygonal lasso tool. It's not hard to do, it usually takes one click.
5. Now go to Filter>Blur>Gaussian Blur and set it to 7,0.
6. Set the layer to Overlay and lower the opacity how much or less you want. In this picture, I lower the opacity to 34%.
7. Done!

Here's my result:
Want to win a really nice prize? Then check here later today or this week. I will be doing a competition and the winners gets a really good prize that can't be found anywhere! I'll write a post about it, so keep your eyes open. And the prize will remain a secret until the winner recieves it.
/Pavvo

Tuesday, February 22, 2011

Tutorial #4

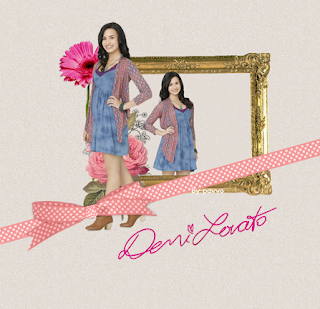
How to make this:
1. Open a new document in Photoshop with the size 447x429
2. Choose this background. Of course you can choose whatever background you want, but for this tutorial, choose this, it goes along with the pink theme.
3. Place (File>Place) this frame into your document with the background. Rotate it and place it somewhere in the middle or wherever you want it.
4. Now, choose an image that's gonna be in the frame. I chose a Demi Lovato image. Place it in front of the frame, then change the Blend mode to whatever you think shows the best result. I chose 'Linear Burn'. Delete the parts that's outside the frame and the parts you don't want.
5. Now you're gonna add this flower. Place the flower in the left of your frame. Change the size.
6. Now you're gonna add this flower texture, in front of your other flower. Change the size.
7. Now place this flower in front of the other flowers. Change the size.
8. Now you're gonna add your second picture. Change the size and make it transparent. Place it in front of the flowers.
9. Now add this texture. Rotate it a little bit and place it somewhere where I've placed it (look in the picture)
10. Add the text you want. I added the Demi Lovato logo, but you are free to choose the text you want!
11. Done!

Saturday, February 19, 2011

Tutorial #3

I did not make this tutorial, but it was cool so I thought I'd share it!
Written by: popxit on Disney Leaks. Edited by: Pavvo


How to make this:


1. First off, take this texture. It will be your base image, so better take it.

2. Take whatever picture you want, After you've opened up your image, resize, sharpen, color, and then copy and paste it onto your 'base image'. Try pasting it in the middle, but leave some space in both left and right and leave more space on the left since we'll be adding more stuff on that side. And don't make the picture too big! Otherwise the textures/stocks won't fit.


3. Take this blue ribbon/bow and paste it on top of the image (remember to resize it and sharpen). Then take this blue ribbon and place it on the bottom part of the picture.

4. Create a new layer and take this texture, after resize it, sharpen etc and then paste it on your base image (on the side of the picture) and flip it vertically. In Photoshop I believe it's Edit-Transform-cw 90 degrees. After you paste it, use the rectangle tool and select the unwanted ribbon past and then in order to delete it, press 'del' button on your keyboard or simply erase it with the eraser tool.


5. Again, create a new layer and then take this floral paper texture; resize, sharpen, etc and paste it on the base image. once again, take the rectangle select tool and delete the unnecessary parts. Then, take this flower and sharpen it and paste it on the left side of the picture overlapping the brown and blue ribbon.

6. Then take this camera; resize, sharpen, and then paste it on your base image. After that, rotate and re-sharpen once again and place it on the left corner of your picture. Then, take this small camera[sharpen if you desire; i did though] and place it below the big camera by dragging the big camera layer over the small camera layer.


7. Then take this little pearl like texture and place it underneath big camera and small camera by dragging the layers over it. after you paste it, erase the little dotty pearls you think are kinda left over. Then add this flower texture; resize, sharpen etc and paste it on the right corner of the picture.

8. Take this brush; sharpen and paste it below big camera and small camera by dragging the layers over it as stated above. Then take this other brush and paste it below the picture, erase the part of the brush the overlaps the picture.

9. Go back to your orginal picture;resize, desaturate; sharpen then make a new layer on your base image and paste the small desaturated one on top of the colored picture, then take the eraser tool and erase around it and make it blend in with the big colored picture, somewhat.

10. Take this brush; sharpen it and paste it on top of the blue laced ribbon at the top; overlapping both the lace and the picture. Then take this other brush and paste it on the right side of the top ribbon overlapping both the lace and the picture a little bit, and dont forget to sharpen!

11. Take this flower petals and set them to darken 100% and paste them on the right side at hte very top overlapping the text brush and the blue lace at the top, erase the unnecessary petals if desired.

12. Now's the time to add text! Add the text you want, wherever you want on the picture. Whatever font you choose, it's up to you!


13. I added this little brush on the top, remember to sharpen it for better results.

14. Done!


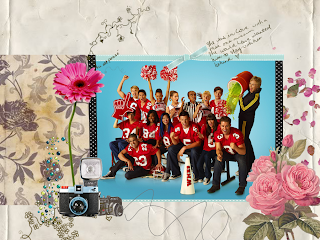
My result:

Wednesday, January 12, 2011

Tutorial #2

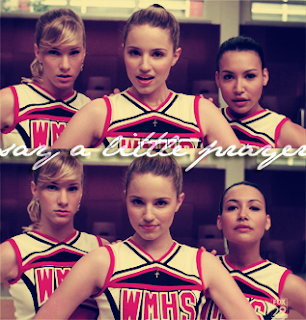
I promised you a new tutorial, so here it comes! =D This is kinda a long tutorial, but it's not hard to do, and it only takes 10-30 minutes. I had to make some of the pictures smaller so blogspot couldn't freak out, lol...
But when you're done the result looks really beautiful :D
Send me your attempts. I'd love to see them!

How to make this:

1. Click on 'File'>'New' and the size should be 317x332.
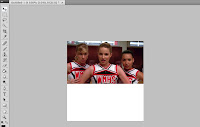
2. Open a picture you want above the other picture (that we'll place later). Click on
'File'>'Place' and choose the picture you decided. Make it fit. I choose to do a graphic with Quinn, Brittany and Santana from Glee.

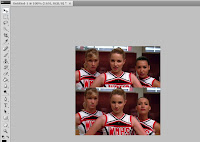
3. Do the same thing with the other picture you've chosen, but place it underneath the first picture


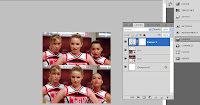
4. Use THIS action. Then, go to 'Layers' and delete all of them, except for the one that's named 'CURVES 1'.


5. Go to Layer>New Adjustments Layer>Brightness/Contrast and put this:
Brightness: -1
Contrast: 32

6. Save the picture as which format you want. Remember you're not done with this yet!

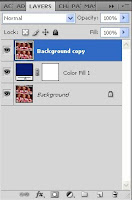
7.Open up the picture you just saved. Go to Layer>New Fill Layer>Solid Color. Put the mode to Exclusion with the opacity 100%. Then when a pop-up comes up when you're gonna choose colors, put this: #071B73.
Copy the background image 'Background' (CTRL+J) and put it above the layer that's called 'COLOR FILL 1'.


8. The layer you just moved are you gonna make black and white (CTRL+SHIFT+U)
Image and video hosting by TinyPic

and then put the layer to Soft Light

Image and video hosting by TinyPic

Go then to Layer>New Fill Layer>Solid Color. Put the mode to Multiply with the opacity 29%. Then when a pop-up comes when you're gonna choose colors, put this: #FDE7AB
Image and video hosting by TinyPic

9. Now you're done with the coloring! Then save the graphic as which format you want. Remember, we're still not done with this yet.

10. Open the image you just saved. Now, we're gonna add a text. You can add the text you want, but I'm gonna write the text 'say a little prayer'. Click on the 'T' and then write what you want. Place the text in the middle of the graphic. Remember write white text if you have pictures that's colorful, black etc. If you have pictures that's white, use black text.
I used the font 'JaneAusten' (it's on dafont.com if you want it) and my picture is colorful, so I'm using white color on the text. You can deside yourself what size you want on the text, I decided to choose the size 36pt. When you're done so far, it should look like this:
Image and video hosting by TinyPic

11. Now, we're gonna make the text look better. Go to Layers and put the blend mode to 'Overlay'.
Image and video hosting by TinyPic

12. Now, the text is not easy to read, so we're gonna make it appear more. Go to Layers and then click on 'fx' and then click on 'Blending Options'
Image and video hosting by TinyPic


13. Check 'Drop Shadow' and 'Inner Glow'. If you want, you can check more and see how it turns out yourself! When you're done, click 'OK'! Now you're gonna save the picture! DONE! =D

Wednesday, July 21, 2010

Coloring!


Selective Coloring
Reds: -100,+3,+5,+26
Yellows: -3
Greens: +100, -100, +100, +100
Cyans: +100,
Blacks: +100, +15
Whites: -15, -6, -5, +9